<?xml version="1.0" encoding="utf-8"?><feed xmlns="http://www.w3.org/2005/Atom" ><generator uri="https://jekyllrb.com/" version="3.10.0">Jekyll</generator><link href="/feed.xml" rel="self" type="application/atom+xml" /><link href="/" rel="alternate" type="text/html" /><updated>2026-09-01T16:53:07+00:00</updated><id>/feed.xml</id><title type="html">그냥 평범한 개발 블로그</title><subtitle>Write an awesome description for your new site here. You can edit this line in _config.yml. It will appear in your document head meta (for Google search results) and in your feed.xml site description.</subtitle><entry><title type="html">RxFlow</title><link href="/ios/rxswift/uinaivgationcontroller/architecture/2018/08/30/RxFlow.html" rel="alternate" type="text/html" title="RxFlow" /><published>2018-08-30T08:00:00+00:00</published><updated>2018-08-30T08:00:00+00:00</updated><id>/ios/rxswift/uinaivgationcontroller/architecture/2018/08/30/RxFlow</id><content type="html" xml:base="/ios/rxswift/uinaivgationcontroller/architecture/2018/08/30/RxFlow.html"><![CDATA[<h1 id="rxflow">RxFlow</h1>

<p>https://github.com/RxSwiftCommunity/RxFlow</p>

<ul>
  <li>각 요소에 대한 간단한 번역 + 예제 코드를 보면서 이해한 내용을 덧붙였습니다.</li>
</ul>

<p><strong>Flow</strong> : 각 <strong>Flow</strong>는 당신의 앱에서 Naivigation 영역을 의미합니다. 이것은 네비게이션 동작 (예 : UIViewController 또는 다른 <strong>Flow</strong> 표시)을 선언하는 장소입니다. <strong>Flow</strong>에는 <strong>Presentable</strong>가 있어서 실제로 미리 정의되어 있는 VC로의 present 같은 동작을 수행한다.</p>

<p><strong>Step</strong> : 각 단계는 응용 프로그램의 Navigation 상태(단계, 종류, <strong>Presentable</strong>를 가리키기 위한 구분)입니다. <strong>Flow</strong>과 <strong>Step</strong>들의 조합으로 모든 가능한 Navigation 동작을 표현할 수 있습니다. <strong>Step</strong>은 <strong>Flow</strong>들에서 선언된 화면에 전파 될 내부 값 (예 : Id, URL 등)을 내장 할 수도 있습니다.</p>

<p><strong>Stepper</strong> : <strong>Step</strong>들을 발행하는 모든 것은 <strong>Stepper</strong>가 될 수 있습니다. <strong>Stepper</strong>들은 <strong>Flow</strong>들 내부에서 발생하는 모든 네비게이션 동작에 대해 반응(UINavigationControllerDelegate 같은 역할)할 수 있습니다. ViewModel, Reactor 같은 느낌.. 이 안에서 판단해서 <strong>NextFlowItem</strong>에 사용할 <strong>Step</strong>를 정하는 식으로 사용한다.</p>

<p><strong>Presentable</strong> : presented 될 수 있는 것들의 추상화 입니다.(기본적으로 UIViewController, <strong>Flow</strong>는 <strong>Presentable</strong> 입니다.) <strong>Presentable</strong>들은 UIKit 호환 방식으로 <strong>Flow</strong>들과 <strong>Step</strong>들을 처리하기 위해 Coordnator가 구독하는 Reactive 항목을 제공합니다. 다시 말해 <strong>Stepper</strong>가 <strong>NextFlowItem</strong>을 정하도록 하는 트리거를 호출한다는 것. 그래서 <strong>NextFlowItem</strong>이 나오면 <strong>Coordinator</strong>가 실제로 실행을 돌려주는 것 같음</p>

<p><strong>NextFlowItem</strong> : <strong>Presentable</strong>과 <strong>Stepper</strong>를 엮어주는 간단한 데이터 구조 입니다. <strong>Coordinator</strong>에게 당신의 Reactive mechanism에서 다음 번에 만들어야 할 새로운 <strong>Step</strong>들이 무엇인지를 알려줍니다.</p>

<p><strong>Coordinator</strong> : 일단 개발자가 네비게이션 가능한 <strong>Flow</strong>와 <strong>Step</strong>의 적절한 조합을 정의하면 <strong>Coordinator</strong>는 이러한 조합을 일관된 방식으로 연결해주는 것입니다.</p>

<p><strong>Flow</strong> 내부에 어떤 VC로 Present할지를 다 정의해놓는데.. 그 기준이 <strong>Step</strong>이고, 결과가 <strong>NextFlowItem</strong>인데 이건 <strong>Coordinator</strong>가 사용한다.
<strong>NextFlowItem</strong>을 만드는 과정에서 <strong>Presentable</strong>하고 (ViewModel:<strong>Stepper</strong>) 같은 걸 만들어서 조합해준다. 데이터를 <strong>Presentable</strong>하고 조합해서 넘길때 <strong>Stepper</strong>로 감싸서 넘겨야 한다.</p>]]></content><author><name></name></author><category term="iOS" /><category term="RxSwift" /><category term="UINaivgationController" /><category term="Architecture" /><summary type="html"><![CDATA[RxFlow]]></summary></entry><entry><title type="html">iOS개발자를 위한 디자인패턴 30분만에 정복하기</title><link href="/ios/designpattern/2018/08/28/iOS%EA%B0%9C%EB%B0%9C%EC%9E%90%EB%A5%BC-%EC%9C%84%ED%95%9C-%EB%94%94%EC%9E%90%EC%9D%B8%ED%8C%A8%ED%84%B4-30%EB%B6%84%EB%A7%8C%EC%97%90-%EC%A0%95%EB%B3%B5%ED%95%98%EA%B8%B0.html" rel="alternate" type="text/html" title="iOS개발자를 위한 디자인패턴 30분만에 정복하기" /><published>2018-08-28T01:15:08+00:00</published><updated>2018-08-28T01:15:08+00:00</updated><id>/ios/designpattern/2018/08/28/iOS%EA%B0%9C%EB%B0%9C%EC%9E%90%EB%A5%BC-%EC%9C%84%ED%95%9C-%EB%94%94%EC%9E%90%EC%9D%B8%ED%8C%A8%ED%84%B4-30%EB%B6%84%EB%A7%8C%EC%97%90-%EC%A0%95%EB%B3%B5%ED%95%98%EA%B8%B0</id><content type="html" xml:base="/ios/designpattern/2018/08/28/iOS%EA%B0%9C%EB%B0%9C%EC%9E%90%EB%A5%BC-%EC%9C%84%ED%95%9C-%EB%94%94%EC%9E%90%EC%9D%B8%ED%8C%A8%ED%84%B4-30%EB%B6%84%EB%A7%8C%EC%97%90-%EC%A0%95%EB%B3%B5%ED%95%98%EA%B8%B0.html"><![CDATA[<p>는 함정이구요. 30분 만에 정복하는 건 무립니다.</p>

<p>제대로 정복하기 위해서는 예제도 만들어 보고, 이해하기 위한 노력이 필요합니다.</p>

<p>하지만 GoF의 디자인패턴 책에서 강조하고 있는 것처럼 디자인 패턴은 “커뮤니케이션 도구”로써의 역할도 훌륭합니다.</p>

<p>아래 내용은 각 디자인 패턴이 어떤 걸 말하는 것인지를 빠르게 이해하고, 되새길 수 있는 역할을 해줄 것입니다.</p>

<p>따라서 아래 내용을 팀 멤버들과 공유하면, 특정 코드가 어떤 디자인 패턴으로 구현되었는지를 설명하여, 커뮤니케이션 비용을 아낄 수 있습니다.</p>

<h2 id="생성-패턴">생성 패턴</h2>

<ul>
  <li>추상 팩토리 패턴
    <ul>
      <li>생성만 하는 팩토리</li>
      <li>서로 관련 있는 객체들의 집합을 만들 수 있는 프로토콜(인터페이스)를 제공</li>
      <li>관련패턴
        <ul>
          <li>팩토리 메서드 패턴이 여러개 모이면 추상팩토리와 같은 모양이 됨
            <ul>
              <li>참고 : https://dzone.com/articles/factory-method-vs-abstract</li>
            </ul>
          </li>
        </ul>
      </li>
    </ul>
  </li>
  <li>팩토리 메서드 패턴
    <ul>
      <li>생성되는 객체의 구체적 타입을 서브 클래스에서 정하도록 하는 것</li>
      <li>프로토콜에는 생성에 관여하는 메서드가 정의됨
        <ul>
          <li>이 메서드의 결과는 프로토콜 혹은 부모 클래스</li>
        </ul>
      </li>
      <li>이 클래스는 생성 전용이 아님</li>
    </ul>
  </li>
  <li>빌더 패턴
    <ul>
      <li>프로퍼티들의 초기값을 순서나 필수 여부에 관계없이 체이닝 형식으로 자유롭게 지정 가능함.</li>
    </ul>
  </li>
  <li>싱글 턴
    <ul>
      <li>1개만 있다는 게 보장 되어야 할 때</li>
    </ul>
  </li>
  <li>프로토타입 패턴
    <ul>
      <li>기본 객체를 만들어 놓고 복사해서 사용</li>
    </ul>
  </li>
  <li>널 객체 패턴
    <ul>
      <li>null 체크가 퍼져 나갈 때</li>
      <li>기본값을 정할 수 있을 때</li>
    </ul>
  </li>
</ul>

<h2 id="구조-패턴">구조 패턴</h2>

<ul>
  <li>어댑터 패턴(레퍼)
    <ul>
      <li>클라이언트가 기대하는 인터페이스로 변환</li>
    </ul>
  </li>
  <li>파사드 패턴
    <ul>
      <li>라이브러리의 간략한 인터페이스 제공</li>
      <li>어댑터랑 비슷하지만 목적만 다름.</li>
    </ul>
  </li>
  <li>프록시 패턴
    <ul>
      <li>어댑터랑 비슷한데, 접근을 통제하기 위한 목적</li>
      <li>다른 객체로의 접근을 통제하기 위해서 다른 객체의 대리자 또는 다른 객체로의 정보 보유자를 제공한다.</li>
      <li>데코레이터와 매우 유사, 의도의 차이, 프록시는 실제 객체에 대한 접근을 제어하는 데 초점, 데코레이터는 기존 객체의 기능을 확장하는데 초점</li>
      <li>가상프록시 (Virtual Proxy)
        <ul>
          <li>실체를 대표할 수 있는 대리자
            <ul>
              <li>DB 나 네트워크 너머에 있는 어떤 리소스</li>
              <li>캐시가 그 예가 될 수 있다</li>
              <li>특성상 실체의 모든 기능을 구현하지는 않는다.</li>
            </ul>
          </li>
        </ul>
      </li>
      <li>보호 프록시 (Protection Proxy)
        <ul>
          <li>접근 제어가 목적이다.</li>
        </ul>
      </li>
      <li>스마트 레퍼런스 (Smart Reference)
        <ul>
          <li>실제 객체에 접근할 때 부가적인 기능을 수행할 수 있다.</li>
        </ul>
      </li>
    </ul>
  </li>
  <li>브릿지 패턴
    <ul>
      <li>추상화와 구현을 분리하여 각각을 독립적으로 변형할 수 있게 한다(?)</li>
      <li>말만 어렵지 추상화된 프로토콜(인터페이스)로 분리한다는 의미</li>
    </ul>
  </li>
  <li>컴포지트 패턴
    <ul>
      <li>트리 구조</li>
      <li>부모와 자식이 서로 교환 가능한 구조</li>
    </ul>
  </li>
  <li>데코레이터
    <ul>
      <li>같은 프로토콜(인터페이스)을 구현한 놈으로 감싼다</li>
      <li>응답 체인 패턴과 비슷한 모양새가 되지만 목적이 다름. 이건 기능 추가가 목적임</li>
    </ul>
  </li>
  <li>플라이웨이트 패턴
    <ul>
      <li>동일하거나 유사한 객체들 사이에 가능한 많은 데이터를 공유하여 메모리 사용량을 줄이는 것</li>
      <li>UITableViewController가 UITableViewCell의 공통 데이터를 가지고 있는 방식</li>
    </ul>
  </li>
</ul>

<h2 id="행위-패턴">행위 패턴</h2>
<ul>
  <li>응답 체인 패턴(Chain of Responsibility)
    <ul>
      <li>처리 돌려 막기</li>
      <li>처리 가능한 놈이 나올 때까지 넘기기</li>
      <li>데코레이터 패턴과 모양이 비슷하지만 이 놈의 목적은 올바른 객체를 찾아서 일을 시키기 위한 것</li>
    </ul>
  </li>
  <li>커맨드 패턴
    <ul>
      <li>요청을 객체로 캡슐화</li>
    </ul>
  </li>
  <li>인터프리터 패턴
    <ul>
      <li>컴포지트 패턴하고 비슷한 구성을 만들고 각자에 언어 구문을 평가/해석하는 방법이 기술되어 있다.</li>
    </ul>
  </li>
  <li>이터레이터 패턴
    <ul>
      <li>돌면서 값을 꺼내올 수 있는..</li>
    </ul>
  </li>
  <li>비지터 패턴
    <ul>
      <li>돌면서 같은 방법으로 일을 시킬 수 있는</li>
      <li>응답 체인패턴과 다른 점은 Visitor가 따로 존재한다는 것</li>
      <li>그리고 구성원 모두에게 일을 시킨다는 것</li>
    </ul>
  </li>
  <li>미디에이터 패턴
    <ul>
      <li>객체 간의 결합도를 줄이기 위한 방법, 서로 Delegate 패턴으로 연결</li>
    </ul>
  </li>
  <li>메멘토 패턴
    <ul>
      <li>undo/redo</li>
    </ul>
  </li>
  <li>옵저버 패턴
    <ul>
      <li>관찰자와 관찰가능한 객체</li>
    </ul>
  </li>
  <li>스테이트 패턴
    <ul>
      <li>컴포지션한 대상이 상태를 나타내면</li>
    </ul>
  </li>
  <li>스트레티지 패턴
    <ul>
      <li>컴포지션한 대상이 알고리즘을 나타내면</li>
    </ul>
  </li>
  <li>템플릿 메서드 패턴
    <ul>
      <li>메서드 실행 순서가 중요할 때</li>
    </ul>
  </li>
</ul>

<h3 id="참조">참조</h3>
<ul>
  <li><a href="https://g.co/kgs/65woDF">GoF의 디자인 패턴</a></li>
  <li><a href="https://github.com/ochococo/Design-Patterns-In-Swift">Design-Patterns-In-Swift</a></li>
</ul>]]></content><author><name></name></author><category term="iOS" /><category term="DesignPattern" /><summary type="html"><![CDATA[는 함정이구요. 30분 만에 정복하는 건 무립니다.]]></summary></entry><entry><title type="html">UIButton</title><link href="/ios/uicontrols/2017/12/13/UIButton.html" rel="alternate" type="text/html" title="UIButton" /><published>2017-12-13T06:56:08+00:00</published><updated>2017-12-13T06:56:08+00:00</updated><id>/ios/uicontrols/2017/12/13/UIButton</id><content type="html" xml:base="/ios/uicontrols/2017/12/13/UIButton.html"><![CDATA[<h2 id="누를-수-있는-ui-요소">누를 수 있는 UI 요소</h2>
<ul>
  <li>최소 44px의 너비와 높이를 가져야 한다</li>
</ul>

<h3 id="types">Types</h3>

<figure class="highlight"><pre><code class="language-swift" data-lang="swift"><span class="kt">UIButton</span><span class="p">(</span><span class="nv">type</span><span class="p">:</span> <span class="kt">UIButtonType</span><span class="p">)</span></code></pre></figure>

<h4 id="uibuttontype">UIButtonType</h4>
<ul>
  <li>custom
    <ul>
      <li>사이즈가 0인 버튼이 생성됨, 버튼을 추가하기 전에 사이즈를 정하고, 여타 다른 속성을 설정해야 함.</li>
    </ul>
  </li>
  <li>system
    <ul>
      <li>내비게이션바나 툴바에서 볼 수 있는 일반적인 버튼
<img src="https://user-images.githubusercontent.com/1627416/33926601-25ff2146-e022-11e7-89f3-5da6bfb4c3da.png" alt="System Button" /></li>
    </ul>
  </li>
  <li>
    <p>detailDeisclosure
<img src="https://user-images.githubusercontent.com/1627416/33926623-3b1b7246-e022-11e7-913f-d5e959a18258.png" alt="Detail Disclosure Buttons" /></p>
  </li>
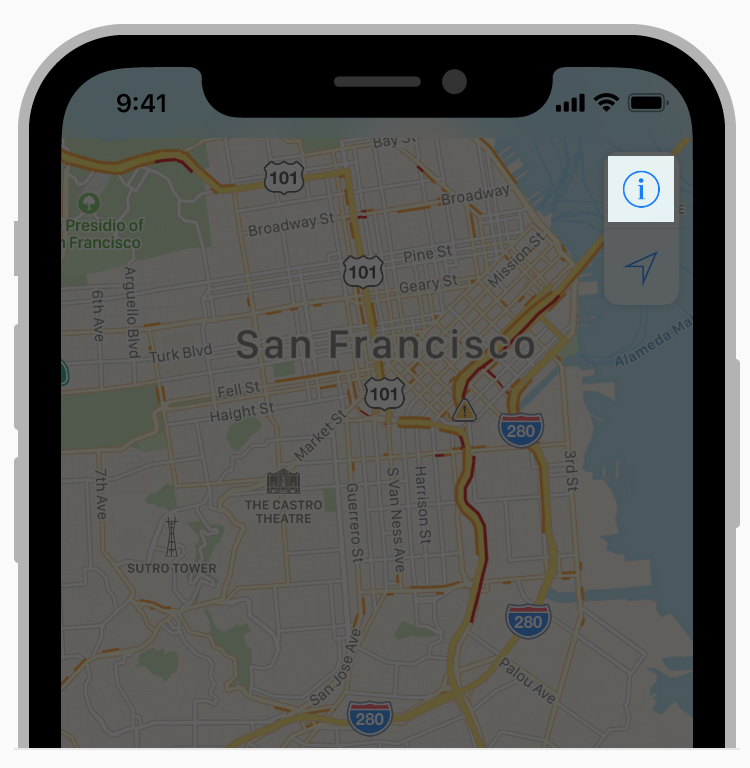
  <li>infoLight</li>
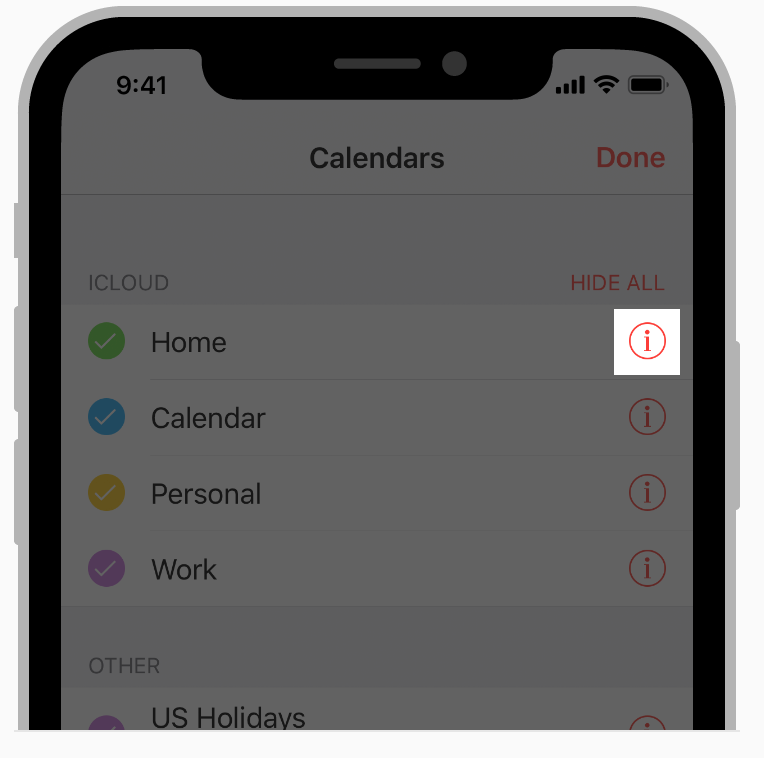
  <li>
    <p>infoDark
<img src="https://user-images.githubusercontent.com/1627416/33926629-41444d0a-e022-11e7-8097-b7d0df0d5c71.png" alt="Info Button" /></p>
  </li>
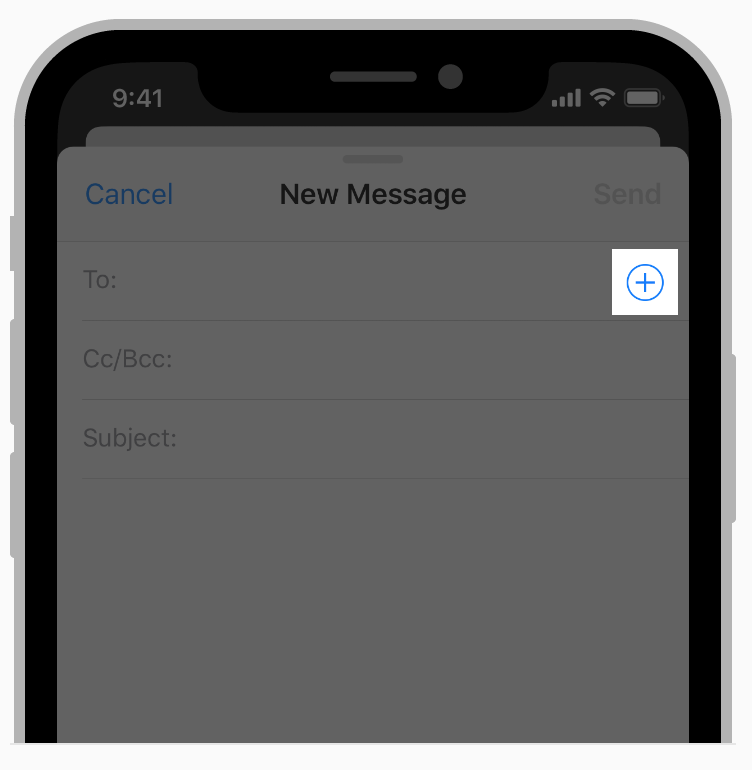
  <li>
    <p>contactAdd
<img src="https://user-images.githubusercontent.com/1627416/33926638-479cb944-e022-11e7-8f83-11d637863551.png" alt="Add Contact Button" /></p>
  </li>
  <li>plain
    <ul>
      <li>system 버튼과 같지만 블러된 백그라운드 뷰가 없음</li>
      <li>보강이 필요함</li>
    </ul>
  </li>
</ul>

<h3 id="states">States</h3>
<ul>
  <li>default
    <ul>
      <li>평소 모습</li>
    </ul>
  </li>
  <li>highlighted
    <ul>
      <li>누르고 손을 떼지 않은 상태</li>
      <li>default + highlight 와 selected + highlight 의 상태를 구분할 수 있음</li>
      <li>adjustsImageWhenHighlighted 를 on 하면 눌릴 때 배경 이미지를 조금 더 밝게 표시함</li>
      <li>애플 문서에도 얼만큼 밝은지는 나오지 않음</li>
    </ul>
  </li>
  <li>focused
    <ul>
      <li>포커스 기반 내비게이션 시스템에서 이 버튼이 focused 되었을 때의 상태</li>
      <li>시각 장애인을 위한 Voice Over로 포커스를 이동 시키거나, 블루투스 키보드를 이용해 포커스를 이동할 때 작동함.</li>
      <li>highlighed 나 selected 때의 모양과는 다르게 표시됨 (안 예쁜 두꺼운 테두리가 씌워짐)</li>
    </ul>
  </li>
  <li>selected
    <ul>
      <li>토글 버튼 등에서 선택된 상태</li>
      <li>highlighted와 조합 가능함</li>
    </ul>
  </li>
  <li>disabled
    <ul>
      <li>버튼이 비활성화 되어서 사용할 수 없는 상태</li>
      <li>adjustsImageWhenDisabled 를 on 하면 비활성 되었을 때 배경 이미지를 조금 더 어둡게 표시함</li>
      <li>애플 문서에도 얼만큼 어두운지는 나오지 않음</li>
    </ul>
  </li>
</ul>

<h3 id="content">Content</h3>
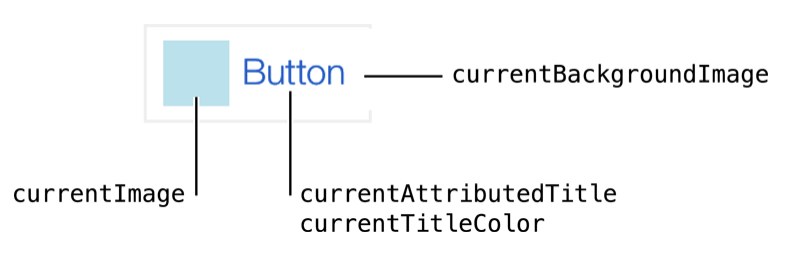
<ul>
  <li>Title + Image + BackgroundImage로 이루어져 있음</li>
  <li>Title
    <ul>
      <li>Font, 색상 등 자유롭게 조정가능, AttributedString을 먹일 수 있음</li>
      <li>reversesTitleShadowWhenHighlighted
        <ul>
          <li>on 하면 버튼이 highlighted 되었을 때, 글자에 깊이감을 주는 그림자가 생김</li>
        </ul>
      </li>
      <li>shadow Offset
        <ul>
          <li>깊이감을 주는 그림자의 위치를 옮길 수 있음</li>
        </ul>
      </li>
    </ul>
  </li>
  <li>Image
    <ul>
      <li>기본적으로 Title 왼쪽에 위치함</li>
      <li>상하 좌우 inset 조정 가능함</li>
      <li>크기도 변경 가능</li>
    </ul>
  </li>
</ul>

<p><img src="https://user-images.githubusercontent.com/1627416/33927198-af6aa296-e024-11e7-8ad2-e6e681e2300c.png" alt="image button" /></p>

<h3 id="참조">참조</h3>
<ul>
  <li><a href="https://developer.apple.com/documentation/uikit/uibutton">UIButton 개발 문서</a></li>
  <li><a href="https://developer.apple.com/ios/human-interface-guidelines/controls/buttons/">UIButton Human Interface Guidelines 문서</a></li>
</ul>]]></content><author><name></name></author><category term="iOS" /><category term="UIControls" /><summary type="html"><![CDATA[누를 수 있는 UI 요소 최소 44px의 너비와 높이를 가져야 한다]]></summary></entry><entry><title type="html">키보드 내리기</title><link href="/ios/tips/2017/12/13/%ED%82%A4%EB%B3%B4%EB%93%9C%EB%82%B4%EB%A6%AC%EA%B8%B0.html" rel="alternate" type="text/html" title="키보드 내리기" /><published>2017-12-13T05:53:08+00:00</published><updated>2017-12-13T05:53:08+00:00</updated><id>/ios/tips/2017/12/13/%ED%82%A4%EB%B3%B4%EB%93%9C%EB%82%B4%EB%A6%AC%EA%B8%B0</id><content type="html" xml:base="/ios/tips/2017/12/13/%ED%82%A4%EB%B3%B4%EB%93%9C%EB%82%B4%EB%A6%AC%EA%B8%B0.html"><![CDATA[<p>UITextField 나 UITextView의 인스턴스를 모르는 상태에서 키보드 내리는 방법</p>

<figure class="highlight"><pre><code class="language-swift" data-lang="swift"><span class="kt">UIApplication</span>
<span class="o">.</span><span class="n">shared</span>
<span class="o">.</span><span class="nf">sendAction</span><span class="p">(</span><span class="kd">#selector(</span><span class="nf">UIView.resignFirstResponder</span><span class="kd">)</span><span class="p">,</span> <span class="nv">to</span><span class="p">:</span> <span class="kc">nil</span><span class="p">,</span> <span class="nv">from</span><span class="p">:</span> <span class="kc">nil</span><span class="p">,</span> <span class="nv">for</span><span class="p">:</span> <span class="kc">nil</span><span class="p">)</span></code></pre></figure>]]></content><author><name></name></author><category term="iOS" /><category term="Tips" /><summary type="html"><![CDATA[UITextField 나 UITextView의 인스턴스를 모르는 상태에서 키보드 내리는 방법]]></summary></entry><entry><title type="html">Welcome to Jekyll!</title><link href="/jekyll/update/2017/12/13/welcome-to-jekyll.html" rel="alternate" type="text/html" title="Welcome to Jekyll!" /><published>2017-12-13T05:24:08+00:00</published><updated>2017-12-13T05:24:08+00:00</updated><id>/jekyll/update/2017/12/13/welcome-to-jekyll</id><content type="html" xml:base="/jekyll/update/2017/12/13/welcome-to-jekyll.html"><![CDATA[<p>You’ll find this post in your <code class="language-plaintext highlighter-rouge">_posts</code> directory. Go ahead and edit it and re-build the site to see your changes. You can rebuild the site in many different ways, but the most common way is to run <code class="language-plaintext highlighter-rouge">jekyll serve</code>, which launches a web server and auto-regenerates your site when a file is updated.</p>

<p>To add new posts, simply add a file in the <code class="language-plaintext highlighter-rouge">_posts</code> directory that follows the convention <code class="language-plaintext highlighter-rouge">YYYY-MM-DD-name-of-post.ext</code> and includes the necessary front matter. Take a look at the source for this post to get an idea about how it works.</p>

<p>Jekyll also offers powerful support for code snippets:</p>

<figure class="highlight"><pre><code class="language-ruby" data-lang="ruby"><span class="k">def</span> <span class="nf">print_hi</span><span class="p">(</span><span class="nb">name</span><span class="p">)</span>
  <span class="nb">puts</span> <span class="s2">"Hi, </span><span class="si">#{</span><span class="nb">name</span><span class="si">}</span><span class="s2">"</span>
<span class="k">end</span>
<span class="n">print_hi</span><span class="p">(</span><span class="s1">'Tom'</span><span class="p">)</span>
<span class="c1">#=&gt; prints 'Hi, Tom' to STDOUT.</span></code></pre></figure>

<p>Check out the <a href="https://jekyllrb.com/docs/home">Jekyll docs</a> for more info on how to get the most out of Jekyll. File all bugs/feature requests at <a href="https://github.com/jekyll/jekyll">Jekyll’s GitHub repo</a>. If you have questions, you can ask them on <a href="https://talk.jekyllrb.com/">Jekyll Talk</a>.</p>]]></content><author><name></name></author><category term="jekyll" /><category term="update" /><summary type="html"><![CDATA[You’ll find this post in your _posts directory. Go ahead and edit it and re-build the site to see your changes. You can rebuild the site in many different ways, but the most common way is to run jekyll serve, which launches a web server and auto-regenerates your site when a file is updated.]]></summary></entry></feed>